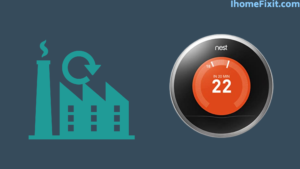
The Nest Thermostat is a great device for the home and office. Nest thermostats make it easy to control home and office appliances remotely.
This, in a way, saves time and effort and is more effective than traditional AC remotes. Many Nest thermostat owners report that their floor thermostat does not cool or the device does not turn on the AC.
The truth is that we have found very few reasons that stop their cooling. If your Nest Thermostat is also experiencing cooling-related issues, then you may need some troubleshooting methods.
However, the manufacturer says that the main reason for this is that the wire connection in the device’s backend is weak. That is why the wiring between the thermostat and the AC must be arranged evenly.
Even if all these things are correct, if proper cooling or set temperature is not reached, there can be several reasons.
Your thermostat is not cooling mainly because you mislabeled your wiring according to the “conventional” side of your old thermostat instead of using the “heat pump” side. To fix this, relabel the wiring from your old thermostat setup using the heat pump side and rewire your Nest accordingly. This will fix your problem.
Quick Navigation
What to Do When Your Nest Thermostat Isn’t Cooling?
As we mentioned above, a poor wiring setup can also cause your Nest thermostat to stop cooling. Sometimes consumers label the wire on the conventional side of the thermostat. In stark contrast, professionals advised this setup on the “heat pump” side.
This is the first and foremost reason why the Nest Integrated AC does not blow cool air.
- Sometimes your Nest thermostat is not cooling due to power outages.
- Even due to its regular use and not maintaining it on time, it may also develop technical faults. Just restart before starting.
- Maybe you have connected the wrong wire to the AC.
- Maybe there is a lack of connection in the Y1 terminal.
- The motion sensor of the thermostat is not working properly.
- This can also happen if you have replaced the Nest battery for a long time.
- Your smart device may disconnect from Wifi by itself after some time.
- Internal damage to your structure can cause frequent clicking or thumping sounds.
Suggested Read: What To Do When Your Roku Remote Blinking Green Light
Is Your Nest Thermostat Not Cooling?
A missing or incomplete connection is usually the main reason for a Nest thermostat not cooling. Apart from this, many other factors are responsible for this. For we request to read each answer given below properly.
- Confirm your cooling system.
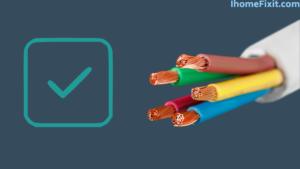
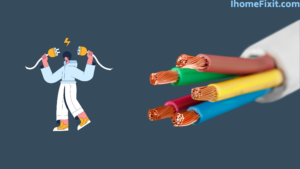
- Check the Nest thermostat wiring.
- Disconnect the common wire.
- Take a Look at the Circuit Breaker Box.
- Auto schedule may be disabled.
- Incorrect RC and RH wiring.
- The system is slowing down.
- Keep the Nest software updated.
Confirm Your Cooling System
Many homeowners make the mistake of identifying the type of cooling system they need. Let’s say you have a heat pump system, but you set up the wire in conventional rows.
So it is very important to know what type of cooling system you have. The simplest and easiest way for this is that you can check in the back of your home device.
Here you will find the sections including product label, category, and product details. Let’s say you still have a problem with the type of cooling system.
So you Google with your model number and search for detailed information. After confirmation, re-label the wires according to the compatible setup.
Check the Nest Thermostat Wiring
When your AC is not cooling, the first thing you should do is check its wiring. Often these nested thermostats have multiple connections of bulk or loose wiring.
Such wiring can cause much-unwanted damage besides not cooling the device. Hence check that your internal wiring is properly arranged in the structure.
Check the Nest Thermostat wiring by performing the following steps
- First of all, you check that there is no power supply of any kind in it. Otherwise, it can cause you a loss of wiring time.
- Then take the display screen from the Nest and check the connection.
- Check that all the wires are in their proper place and there is no damage of any kind.
- Now replace the screen and turn on the power supply.
- Then wait at least 1 to 2 minutes and turn on the device to check.
Disconnect the Common Wire
We all know that the common (C) wire allows 24 VAC power to flow continuously through the thermostat. Now this “C” wire is connected to the nest. However, many users say that ditching this standard wire offers many options. It also helps the nest reach the target temperature.
In this way, if your Nest thermostat is not cooling, then you can also try this option.
To do this, the following steps have to be taken
- Turn off all power supplies coming to your Nest.
- Now carefully open the wiring chamber of the device.
- You see already connected wires like Y1, W1, C (Common), and RH-Power.
- Then disconnect the “C” wire and leave the device alone for some time.
- Now turn on the power and check the Nest thermostat again.
Suggested Read: What To Do When Your TCL TV’s Light Starts Blinking
Take a Look at the Circuit Breaker Box
If your Nest Thermostat is still not cooling, you can check in the circuit box in your home to see if any circuit breakers have tripped, and if you find any circuit breakers tripped, turn them on. And check again.
Auto-Schedule May Be Disabled
Many times your AC does not cool down at night or does not provide cool air when you need it. Your Nest Thermostat is probably auto-schedule enabled for this. This is what you need to know, and it includes an eco-friendly feature to control the temperature of your thermostat remotely.
Many users enable such a feature and forget to do something similar to them. As a result of this, your device cools down after the process and sometimes lacks temperature.
In such cases, two options need to be disabled in your Nest thermostat.
- First, open your Nest app on your mobile.
- Find the ECO-temperature option and disable it.
- Go to the Auto-Schedule option and disable it.
Incorrect RC and RH Wiring
You may be wondering what RC and RH are. Could this be a member of BTS? The question arises in your mind. Learn more about this.
RH stands for Red Heating. This connection is what powers your Nest thermostat to heat. RC stands for “red coolant,” which allows the cooling system to operate.
For this connection, you need an R wire, RC port, and RH port. The wrong connection of this wire can also cause the problem.
Put the “Red wire” in the right place.
Always ensure that the power supply is switched off before making any kind of wire connection, and then do any work related to the wire. The first thing to do after this is done is to remove the thermostat screen.
Now you can see the main grid. This gives you different ports with labels. Your Nest thermostat has RC and RH ports.
Look for the Red wire
Your old thermostat has an R wire, also known as the common wire. This red wire is connected to both the RC and RH ports. It is bridged with the help of another piece of wire known as a jumper. Thus a Nest thermostat typically requires 2 R wires. This wire is fitted in its proper place.
If you have two R wires, check that they are secure. Also, make sure they are in their correct ports. If you have a single R wire, put it in the RH port. Now turn on your circuit breaker and thermostat.
Now, please wait for it to cool down. If you still suffer from the problem of not cooling, put this red wire into the RC port and check again. This should start the cooling process.
Suggested Read: No Power to RC Wire Detected E73 | Solutions That Work
The System Is Slowing Down
If there is no problem with the hardware of your thermostat, then the problem is related to your software. You should always remember that all these devices work on very complex systems.
Sometimes this system can also be overloaded. As this system works 24/7, it may also need to breathe a little faster. Apart from that, these innovative companies are always making small changes in their software.
You may have missed an update or two because of this, but your thermostat is struggling to cool down.
Update the Thermostat
Always keep your Nest Thermostat updated. It updates automatically when connected to WiFi. Sometimes this thermostat may also need to be updated manually.
To manually update the Nest Thermostat, you must take the following steps
- First, you go to its home screen.
- Now go into settings.
- Then click on version. If you see any new update here, then select it and update.
- For Nest E and Nest Learning thermostats, go to your home screen. Select Settings. Tap Software, then Update.
Restart the Thermostat
To restart your Nest thermostat, first, turn it off and wait for at least 5 to 7 minutes. It takes time for it to stop completely. Please turn it on again after this time interval.
You don’t need to worry because none of your saved data will be lost. After the restart function, wait until it starts to cool down.
Suggested Read: Samsung TV Turns On By Itself | How To Fix This Problem
How to Factory Reset the Nest Thermostat?
If all the solutions mentioned above don’t work, then you should do a factory reset as a last resort.
To factory reset the Nest Thermostat, you must take the following steps
- First of all, you open the Nest application on your smartphone.
- Now go to the top left corner of your home screen.
- Then select the house that has the thermostat you want to delete.
- Now tap on the thermostat you want to remove from the app screen.
- Then go to “Settings,” located in the upper right section.
- Scroll down to the bottom.
- You get an option here that asks “Confirm Thermostat” in red color.
- Tap to confirm, and your thermostat will be successfully removed from your Nest account.
Frequently Asked Questions
Why is my Nest not turning my AC on?
The most common reason your Nest Thermostat AC won’t turn on is that the thermostat isn’t getting enough power or its battery is low. A loose wire or an incorrect connection can also cause this problem. Apart from this, your router may also have a problem.
Why does my Nest thermostat say it takes 2+ hours to cool?
Whenever you get such a message, that means your thermostat is slowing down to cool your home. It usually happens when the current room temperature is at a certain level, but you are trying to change that temperature to a comfortable temperature for your home.
Why does my thermostat take so long to cool?
One of the most common causes, when it takes longer to cool your home is a dirty filter. When the filter gets clogged with dirt and debris, as you check, it limits how much air the AC can bring to cool the indoor unit.
Like this post? Could you share it with your friends?
Suggested Read –
- YouTube Search Not Working?
- Panasonic TV Red Light Blinking
- How to Reset Philips TV Without Remote?
- Is Insignia a Good Brand? | An Honest Review
- How to Setup Samsung TV to WIFI Without Remote?

